We recently moved into a rural home running on well water. The well pumps groundwater into a storage tank, which holds about 5,000 gallons of water. However, due in large part to the historic drought in California our well runs dry sometimes and we need to get water delivered when our tank runs low. In order to know when to order our next truckload of water I build a water level monitor that estimates water levels in our storage tank via a 4-20mA pressure sensor loop, processes the data on an Arduino nano board, and streams the data to a server for storage and monitoring using the MQTT messaging protocol.
Why make and not buy? To start with, there really seems to be only one mature product on the market and it costs $599 NZD and ships from New Zealand. Obviously it would have saved me a lot of time to just buy this product but I wanted to save some money and learn a bunch of things while doing so. I also got some help from my dad, who is an electrical engineer, and it was nice to spend that time with him.
System design
I went through several iterations of this project due to a combination of faulty hardware software dependency issues. I’ll spare (most of) the details of the initial versions but suffice it to say there was a lot of trial and error and some returns made. The final product comprises several physical components:
- 4-20mA sensor converts pressure to resistance, with 0 meters of water resulting in 4mA and 5 meters resulting in 20mA (powered by an 12-32v DC power supply)
- 180 Ohms resistor converts resistance to analog voltage, ranging from 0.72v (4mA * 180 ohms) to 3.6v (20mA * 180 ohms)
- Arduino nano 33 IOT board reads analog voltage and calculates water level (powered by a 5v DC power supply)
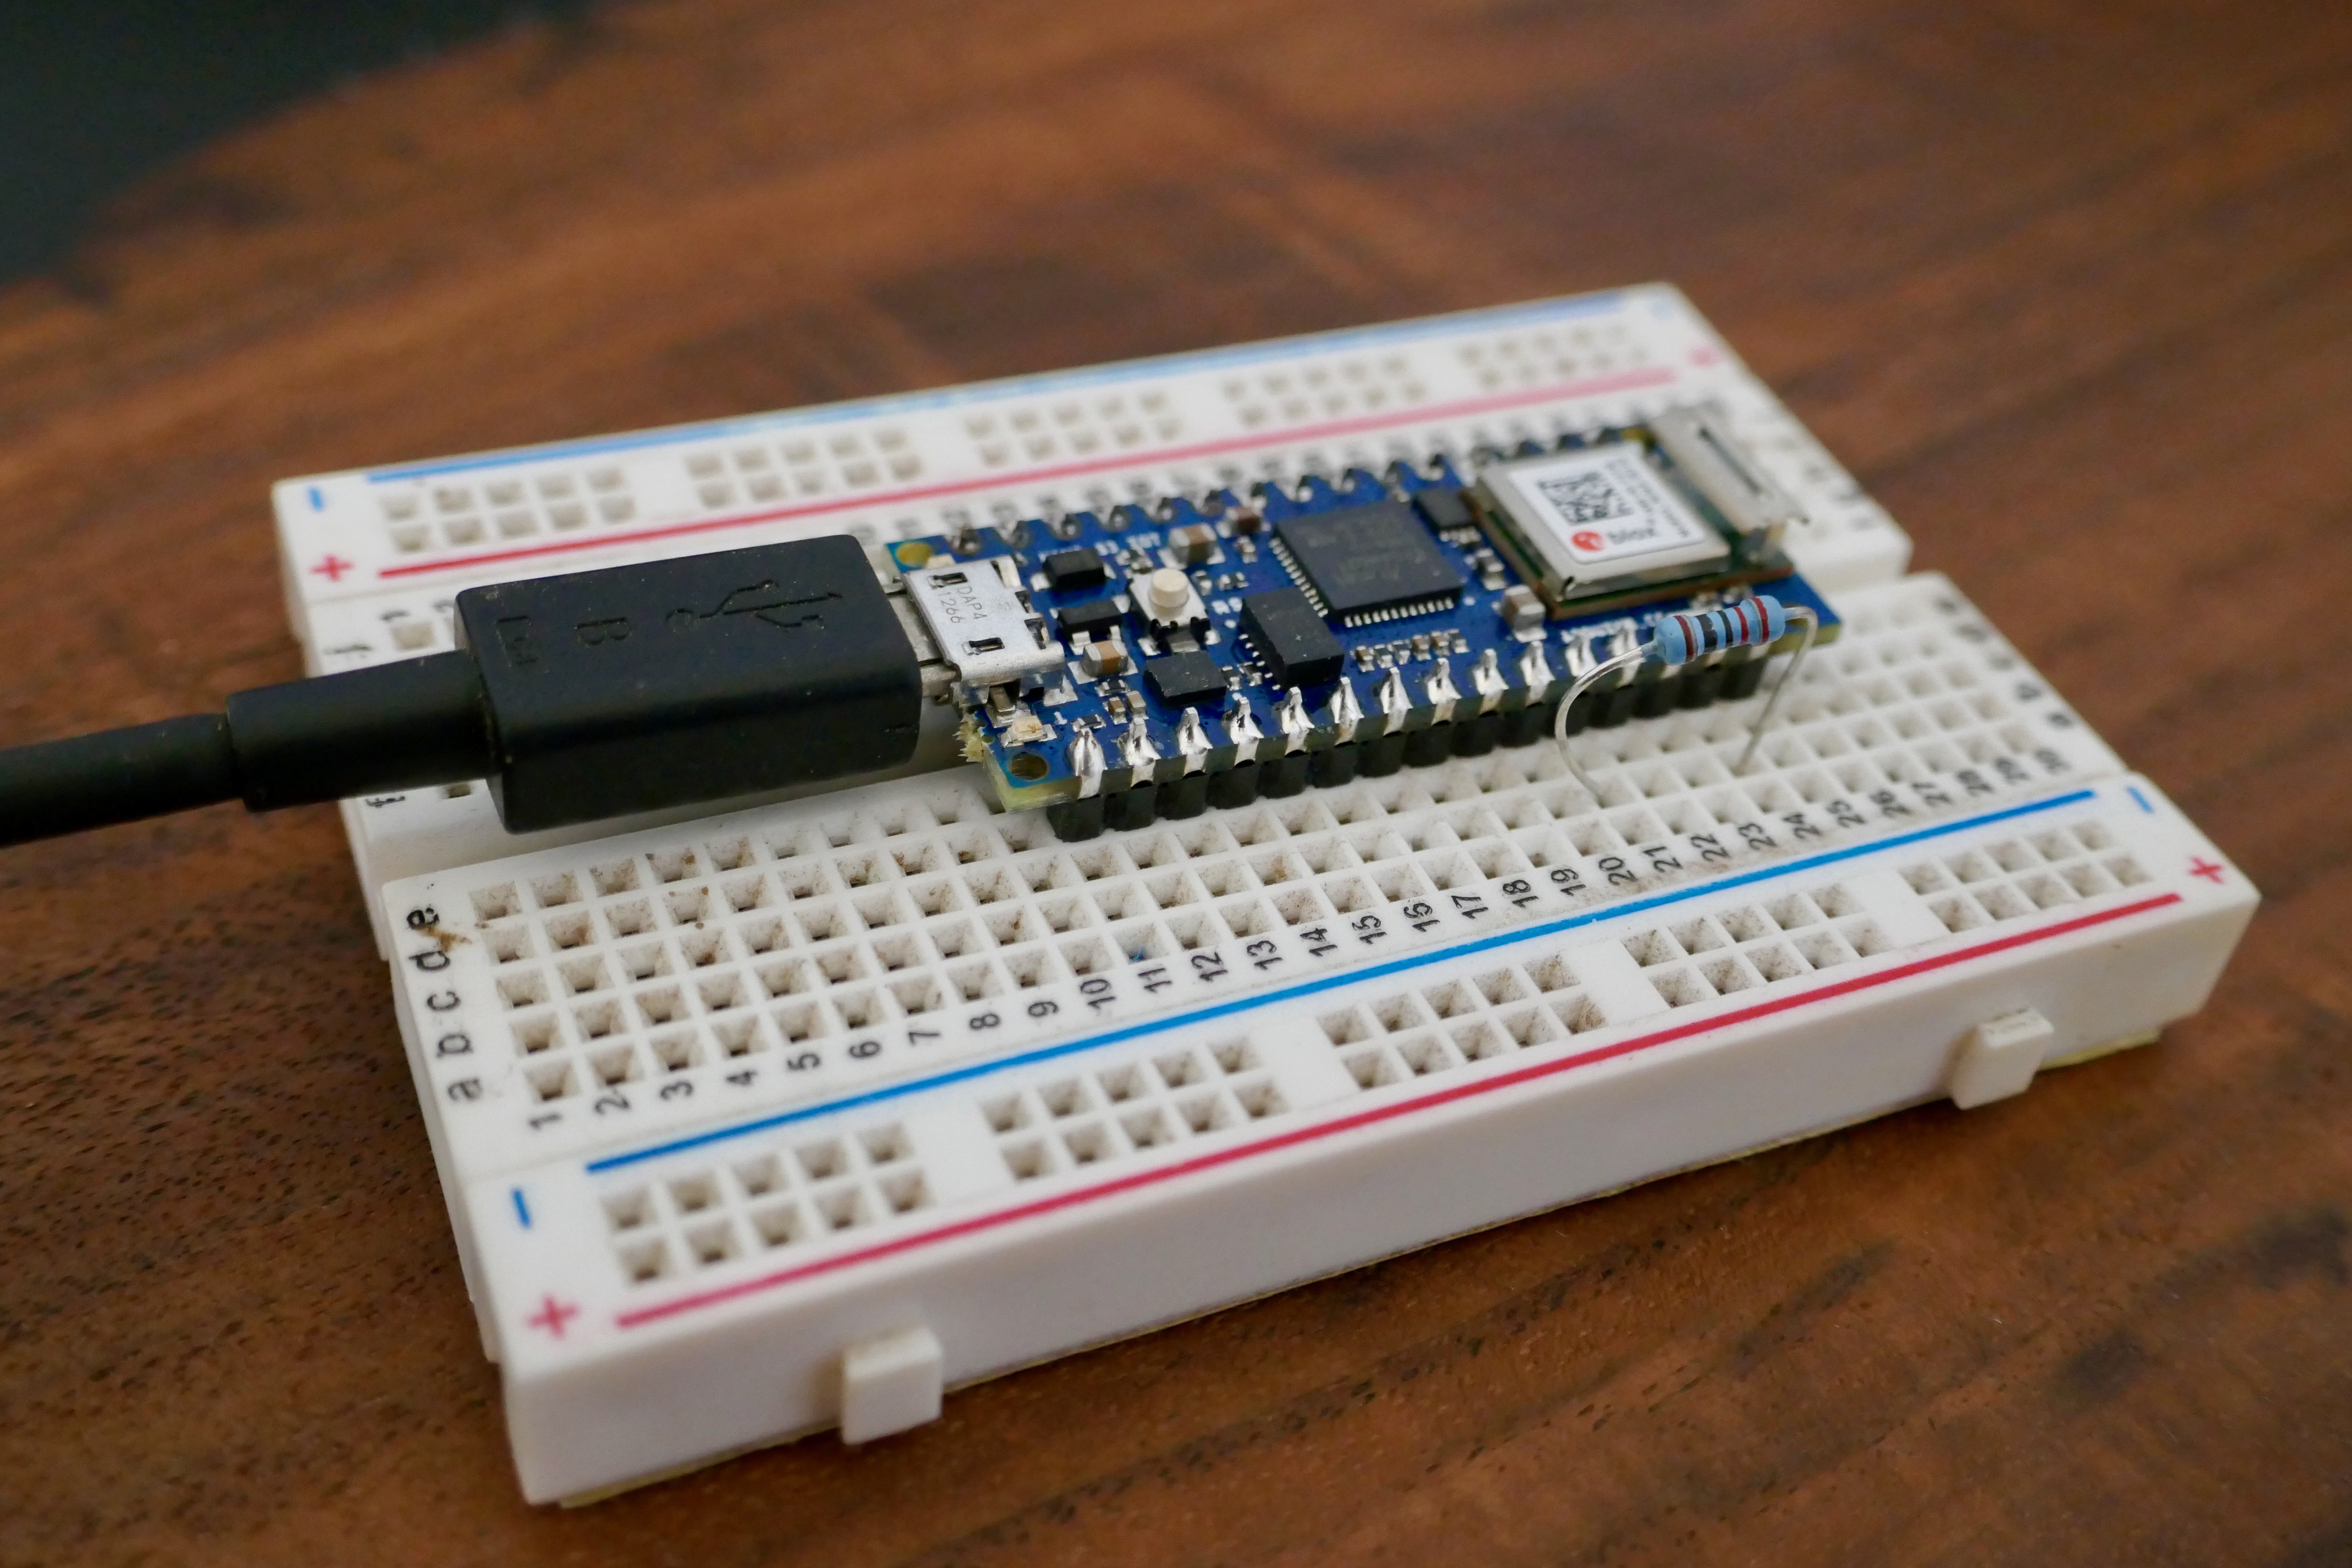 A close up of the board mounted on a breadboard with resistor
The board publishes the estimated water level over WiFi using the MQTT messaging protocol to a server where the data is stored and processed. I use io.adafruit.com to subscribe to my MQTT topic and visualize the data, though I had used the AWS IOT service in an earlier version1. I was also able to easily set up email alerts on Adafruit to notify me when my water level drops below a certain point.
The installation was fairly straightforward due to three factors:
- There happened to already be a 120v power supply and physical enclosure near our water tank
- My water tank already had a hole drilled in the top through which I ran the sensor wiring
- There was good WiFi coverage at this physical enclosure
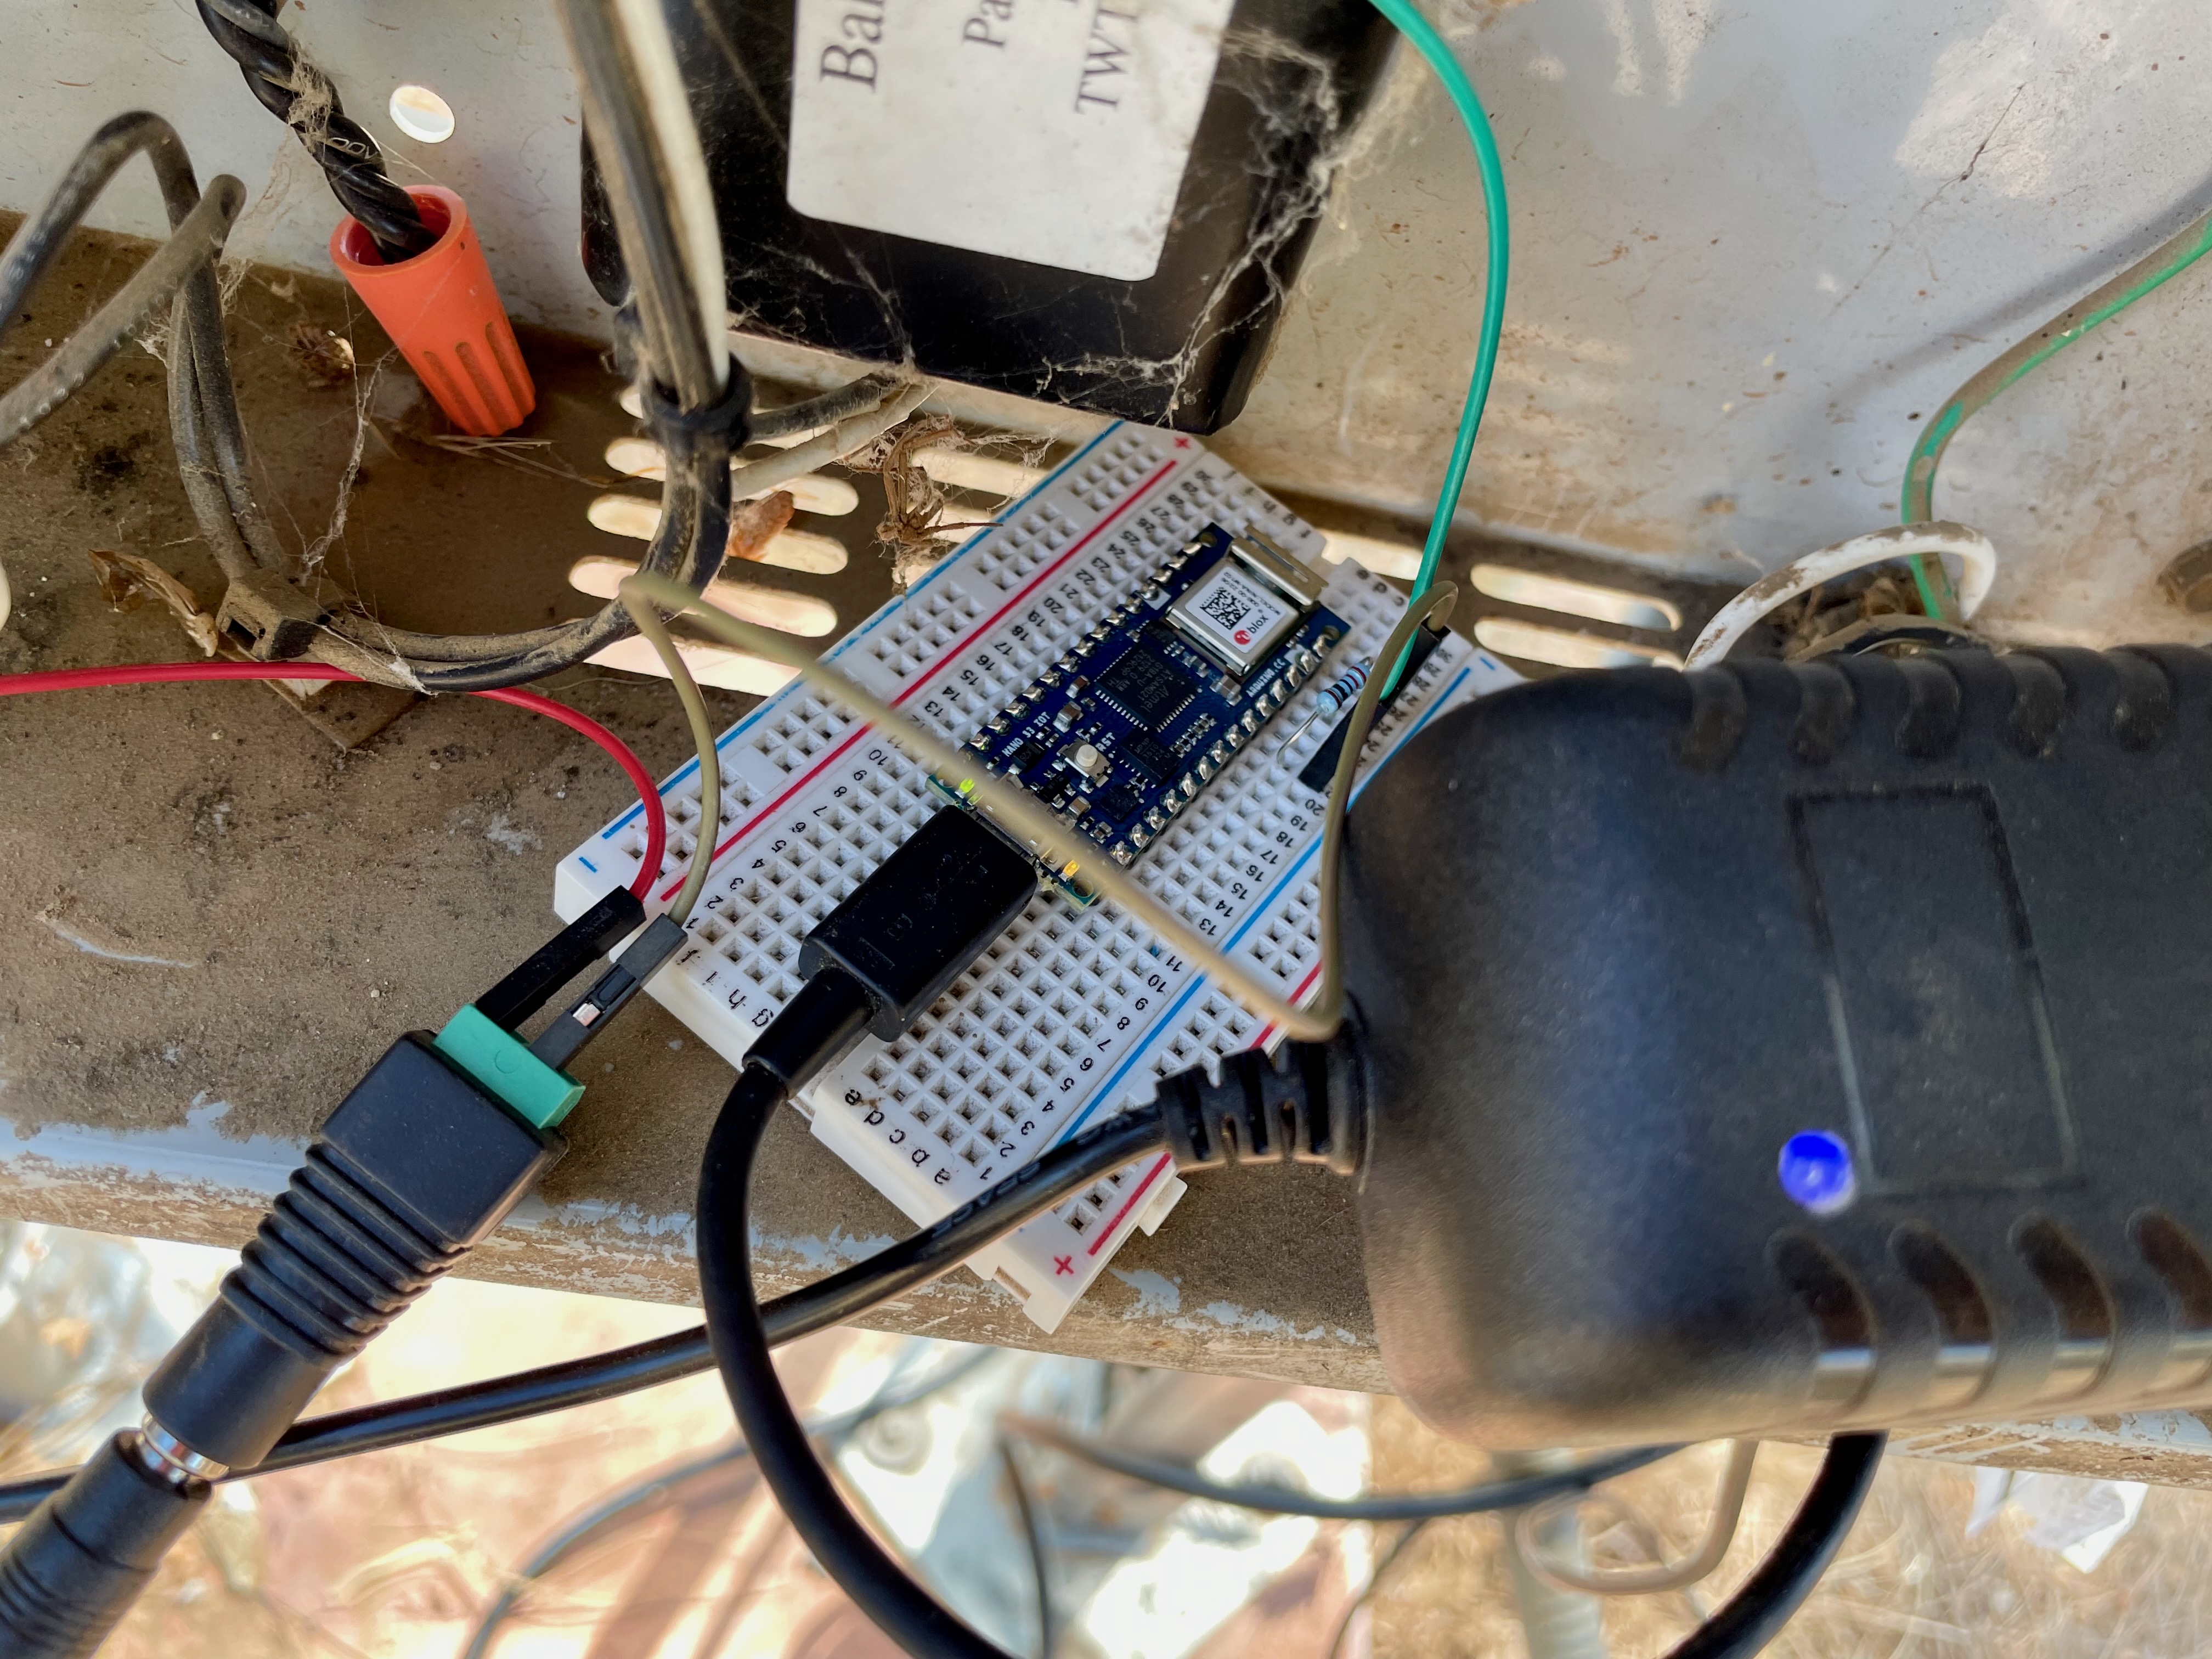 Board in position in the physical enclosure
Final cost of materials
Not including previous, failed versions, the cost of my setup was roughly $90 and this resulted in some extra supplies (e.g., breadboards, jumper wires) left over.
| Item | Cost at time of purchase | Link |
|---|---|---|
| Arduino Nano 33 IoT | $24.48 | link |
| 4‑20mA Water Level Transducer | $48.14 | link |
| Breadboard (6 pk) | $9.99 | link |
| Breadboard jumper wires (120 count) | $6.89 | link |
| Total | $89.50 |
Potential next steps
In the future I may subscribe to my MQTT topic on my server in order to permanently store the data. This would also enable me to implement anomaly detection and forecasting but right now I feel the development and maintenance of this functionality would complicate my life more than improve it.
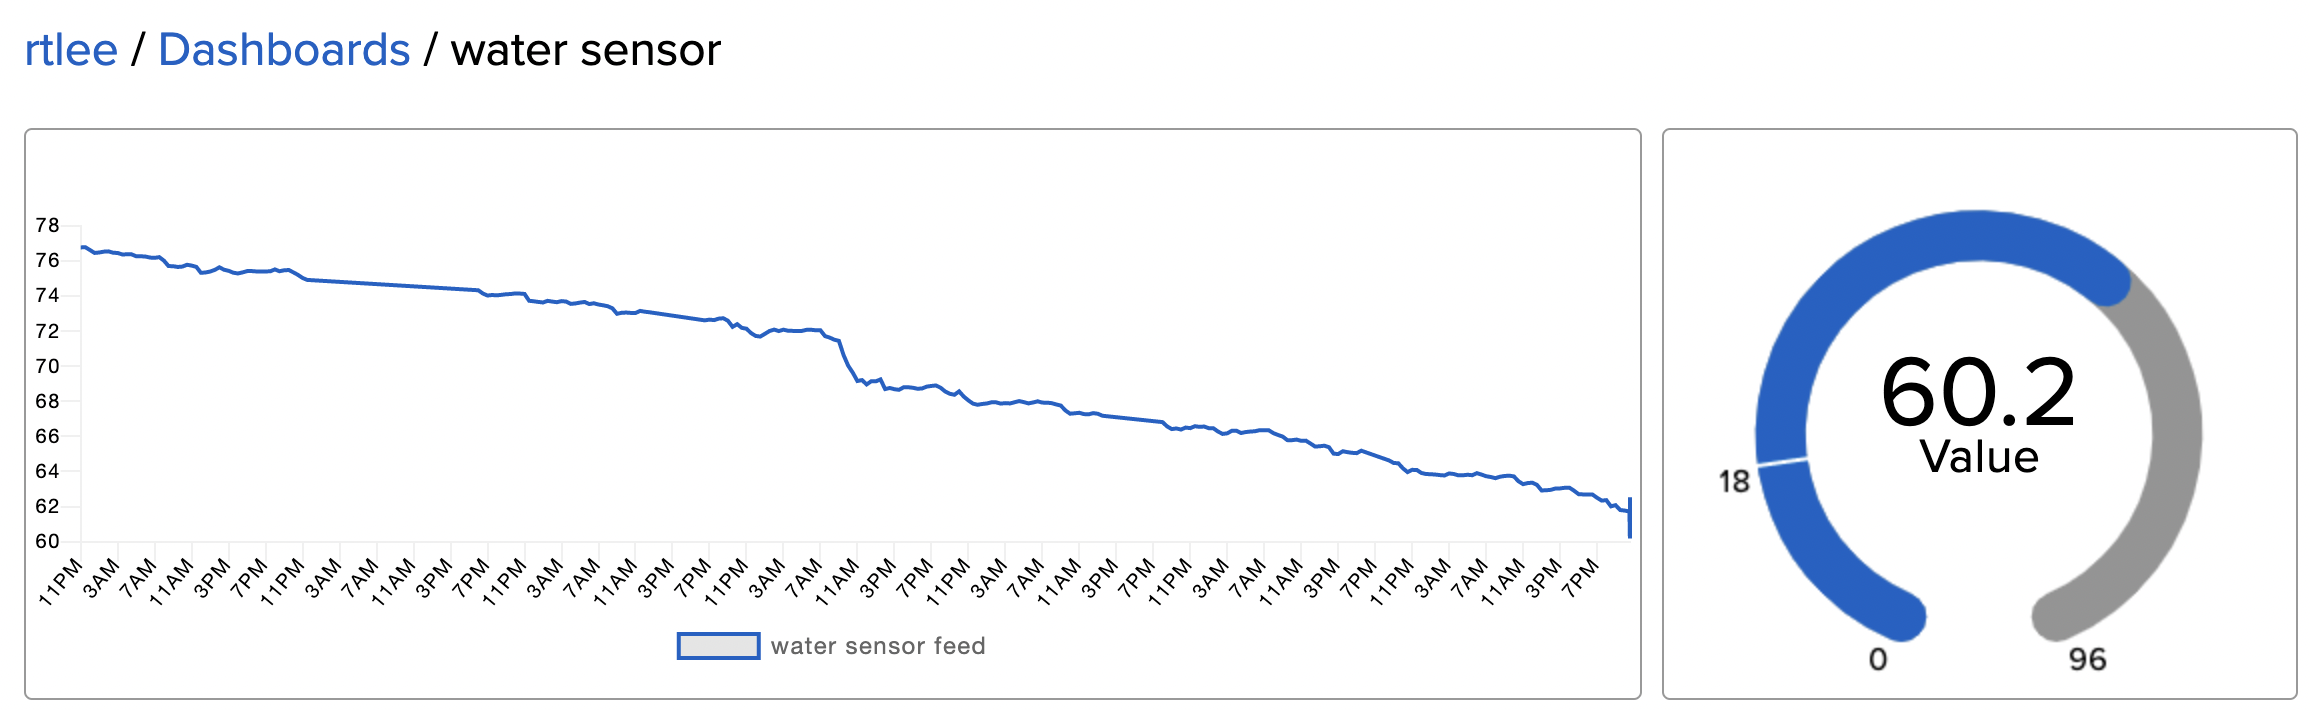 Snapshot of my water monitor dashboard
The Arduino code I developed for this project is open source and can be found in this repository.
-
I had initially used the AWS MQTT service, along lambda and DynamoDB data to store the data; separately I wrote a flask app to display the data and notify me when the water was low. This worked fine on my initial setup but I eventually switched board architectures (from ESP32 to Arduino Nano 33), wifi libraries, and messaging libraries due to various reliability issues. At that point I was no longer able to authenticate on AWS with my new board, which used a self-signed SSL certificate and this didn’t seem to be well-supported on the AWS IOT service. ↩